Sunshine Yellow Duck Baby Romper Set
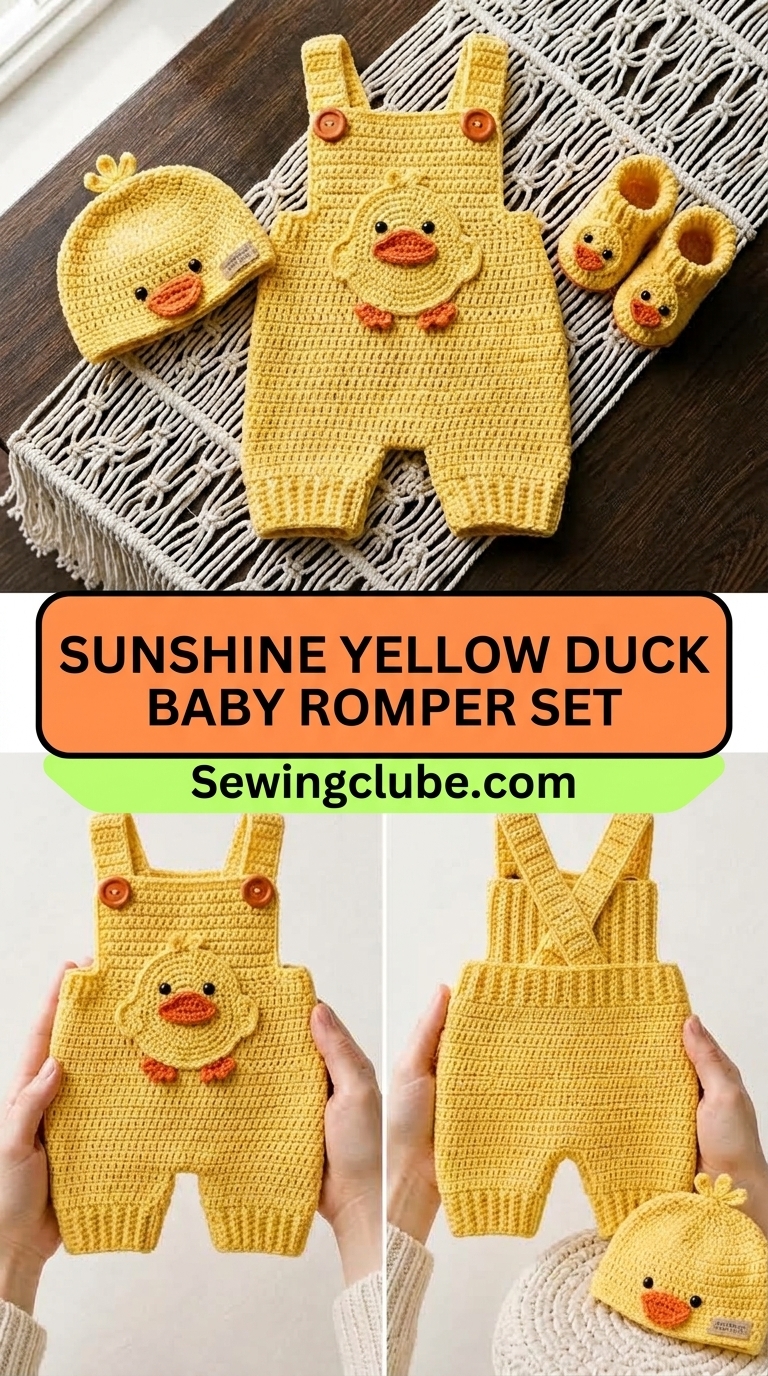
The Sunshine Yellow Duck Baby Romper Set is a delightful addition to any little one’s wardrobe. Perfect for sunny days, this adorable outfit not only showcases a bright and cheerful color but also features charming duck motifs that make it ideal for both playtime and special occasions. In this guide, we will walk you through the entire process of sewing this lovely romper from start to finish, including the materials needed, step-by-step instructions, and styling tips to ensure your little one looks adorable.
Materials and Tools Required
Before diving into the sewing process, it’s essential to gather all the necessary materials and tools. Here’s what you will need:
- Fabric: Choose a soft, breathable fabric such as cotton or linen in sunshine yellow.
- Thread: Coordinating thread that matches your fabric.
- Buttons: Two or three cute buttons for the straps.
- Elastic: For the leg openings and back waist for a comfortable fit.
- Sewing machine: A standard sewing machine will work perfectly.
- Scissors: Fabric scissors for cutting your material.
- Measuring tape: To measure fabric and ensure proper fit.
- Pins: To hold fabric pieces together while sewing.
- Iron: For pressing seams and fabric.
- Pattern: A baby romper pattern (either purchased or self-drafted).
Fabric Recommendations
When selecting fabric for the Sunshine Yellow Duck Baby Romper Set, consider the following options:
- Cotton: Lightweight, breathable, and easy to sew, cotton is an excellent choice for baby clothes.
- Jersey Knit: If you prefer a stretchier option, a cotton-spandex blend jersey knit can provide comfort and flexibility.
- Poplin: This fabric has a crisp finish and is durable, making it suitable for everyday wear.
Step-by-Step Sewing Instructions
Now that you have your materials ready, let’s get started with the sewing process:
1. Prepare Your Pattern
Begin by selecting a suitable pattern for the romper. If you’re drafting your own, ensure you include the necessary seam allowances. Cut out your fabric pieces according to the pattern.
2. Cut Your Fabric
Use your fabric scissors to carefully cut out the fabric pieces. Be sure to cut:
- Front and back pieces
- Straps
- Leg cuffs
3. Assemble the Bodice
Pin the front and back pieces together at the shoulders, right sides facing each other. Sew the shoulders using a straight stitch. Press the seams open.
4. Attach the Straps
Take the straps and pin them to the back bodice at the desired length. Sew in place, ensuring they are securely attached.
5. Create the Leg Openings
Fold the edges of the leg openings inward by about 1/4 inch and press. Then, fold again and sew to create a hem. Insert elastic into the leg openings before fully securing the hem.
6. Sew the Side Seams
Pin the side seams together, right sides facing, and sew from the armhole down to the leg opening. Repeat for the opposite side.
7. Finish the Back and Add Buttons
Finish the back opening by adding a button placket. Sew on the buttons, ensuring they align with the buttonholes you create.
8. Hem the Bottom
Finally, hem the bottom of the romper by folding the fabric inward, pressing, and sewing a straight stitch to secure.
Helpful Sewing Tips and Common Mistakes to Avoid
Here are some tips to help you along the way and avoid common pitfalls:
- Measure Twice, Cut Once: Always double-check your measurements before cutting fabric to avoid wasting materials.
- Use Quality Thread: Opt for high-quality thread to prevent breakage and ensure durability.
- Press as You Go: Pressing seams during construction can help achieve a professional finish.
- Don’t Rush: Take your time with each step to ensure accuracy and neatness.
How to Wear and Style This Clothing Item
The Sunshine Yellow Duck Baby Romper Set is versatile and can be styled in various ways:
- Pair it with cute baby shoes for a complete look.
- Add a lightweight cardigan for cooler days.
- Accessorize with a matching headband or hat to enhance the overall outfit.
Outfit Ideas for Different Occasions
This romper is perfect for several occasions:
- Playdates: Pair with comfy sneakers and a sun hat.
- Family Gatherings: Dress it up with adorable sandals and a matching bow.
- Outdoor Activities: Combine with a lightweight jacket and sunblock for protection.
Care and Maintenance Instructions
To keep your Sunshine Yellow Duck Baby Romper Set looking its best, follow these care instructions:
- Machine wash on cold with like colors.
- Do not bleach.
- Tumble dry on low or hang to dry.
- Iron on low heat if necessary, avoiding any embellishments.
FAQ
1. What age range is the Sunshine Yellow Duck Baby Romper Set suitable for?
This romper is typically designed for infants and toddlers, generally suitable for ages 0-24 months.
2. Is the fabric safe for babies?
Yes, when using high-quality cotton or linen, the fabric is safe and breathable for babies.
3. Can I customize the romper with different colors?
Absolutely! Feel free to experiment with different colors or patterns to suit your style.
4. How do I know what size to make?
Refer to the pattern size chart and measure your baby’s dimensions to choose the correct size.
5. Are there any specific sewing techniques I should know for this project?
Basic sewing techniques such as sewing a straight stitch, hemming, and attaching buttons are essential for this project.
6. Can I add embroidery or decorations to the romper?
Yes! Personalizing your romper with embroidery or appliqué can add a unique touch.
Conclusion
The Sunshine Yellow Duck Baby Romper Set is not only a fun sewing project but also a charming outfit for your little one to enjoy. By following the steps outlined in this guide, you can create a beautiful piece that your child will love to wear. Remember to personalize it with your unique style and enjoy the process of sewing!